
How to Make Natural Lip Balm at Home (Nigerian Recipe with Shea Butter)
If you’re reading this during harmattan season, I already know what’s happening. Your lips are dry, cracked, and peeling no matter how much water you drink. You’ve tried those expensive imported lip balms from the pharmacy ₦1,500, ₦2,000, even ₦3,000 for a tiny tube. Some work for an hour, then your lips are back to feeling like sandpaper.
Here’s what nobody tells you: those “moisturizing” lip balms often contain petroleum jelly and synthetic ingredients that sit on your lips without actually healing them. Moreover, you’re paying a fortune for something you can make at home in 15 minutes for less than ₦500.
I’m talking about real, natural lip balm made with shea butter, the same ori your grandmother used for everything. The kind that actually heals cracked lips, protects against harsh weather, and lasts for months.
As Nigeria’s leading cosmetic raw materials supplier serving over 5,000 beauty formulators, we’ve seen countless people transform their lip care routine (and even start profitable lip balm businesses) using this simple recipe. Today, I’m sharing exactly how to make professional-quality lip balm that works better than anything you’ll find in stores.
Whether you’re making it for yourself, as gifts, or to sell, this is the easiest DIY beauty recipe you’ll ever try. No complicated equipment, no tricky techniques just melt, mix, pour, and you’re done.
Why Homemade Lip Balm is Better Than Store-Bought
Before we jump into the recipe, let’s talk about why you should bother making your own.
You Know Exactly What’s in It Commercial lip balms often contain ingredients you can’t pronounce synthetic fragrances, petroleum derivatives, and preservatives. Furthermore, some actually dry out your lips over time, making you dependent on constantly reapplying. Your homemade version? Pure, natural ingredients you can see and control.
It Actually Heals, Not Just Coats Shea butter doesn’t just sit on your lips like petroleum jelly. Instead, it penetrates the skin with vitamins A, E, and F that actually repair damage and restore moisture from within. Additionally, it has natural anti-inflammatory properties that soothe cracked, painful lips.
Incredibly Affordable That ₦2,000 lip balm from the store? You can make 10 lip balms of better quality for the same price. Consequently, you’re saving serious money while getting superior results.
Perfect for Nigerian Climate Our weather is unique intense sun, dusty harmattan, humidity. Therefore, you need lip protection that works specifically for these conditions. Shea butter, native to West Africa, is literally designed for our climate.
Business Opportunity Here’s the exciting part: each lip balm costs about ₦50-80 to make and sells for ₦300-500. That’s a 400-600% profit margin! Many successful Nigerian beauty brands started by selling homemade lip balm at markets, to friends, and online.
What You’ll Need (Simple Ingredients)
This recipe makes 10 small lip balm tins (5g each) or 6-8 lip balm tubes.
Base Ingredients:
- Natural Shea Butter (raw, unrefined) – 20g
- Coconut Oil or Sweet Almond Oil – 15g
- Beeswax (or Candelilla wax for vegan option) – 10g
- Vitamin E Oil – 5 drops (preserves freshness and adds healing)
Optional Add-ins:
- Essential oils for scent – 3-5 drops (peppermint, lavender, or lemon)
- Natural color – tiny bit of beetroot powder for tint
- Honey – 1/4 teaspoon (extra healing, slight sweetness)
Equipment:
- Small heat-safe bowl or glass measuring cup
- Pot for double boiler (or microwave)
- Spatula or spoon
- Lip balm containers (small tins or tubes)
- Pipette or small spoon for pouring
Total Cost: About ₦500-700 to make 10 lip balms (₦50-70 each!)
If you’re wondering where to get quality, unrefined Natural Shea Butter that melts smoothly and doesn’t have that burnt smell, we stock premium ivory shea butter that works perfectly for lip balm.
Basic Recipe: Classic Shea Butter Lip Balm
This is your starter recipe simple, effective, and impossible to mess up.
Step 1: Set Up Your Double Boiler (3 minutes)
Fill a small pot with about 2 inches of water. Then, place your heat-safe bowl on top, making sure the bottom doesn’t touch the water. Turn heat to medium-low.
Don’t have a double boiler? No problem. You can use a microwave instead just heat in 20-second bursts, stirring between each burst.
Why double boiler? It prevents ingredients from burning and gives you better control. Moreover, it melts everything evenly without hot spots.
Step 2: Melt the Wax First (2-3 minutes)
Add your beeswax to the bowl first. It has the highest melting point, so it takes longest.
Stir occasionally until completely melted. You’ll know it’s ready when there are no solid pieces floating around just clear liquid.
Pro tip: Break or grate the beeswax into small pieces before melting. Consequently, it melts much faster and more evenly.
Step 3: Add Shea Butter and Oil (2 minutes)
Once the beeswax is fully melted, add your shea butter and coconut oil (or Sweet Almond Oil if you prefer lighter texture).
Stir gently until everything melts together into one smooth liquid. This usually takes 1-2 minutes since the heat from the wax helps melt the softer ingredients quickly.
What you should see: A clear or slightly cloudy liquid with no chunks. If your shea butter is yellow/ivory colored, the mixture will have a natural golden tint.
Step 4: Remove from Heat and Add Vitamin E (1 minute)
Take your bowl off the heat. Let it cool for about 30 seconds you want it warm, not hot.
Then, add your vitamin E oil and any essential oils for scent. Stir well to distribute evenly.
Why wait to add these? Heat destroys vitamin E and evaporates essential oils. Therefore, adding them after removing from heat preserves their benefits.
Step 5: Pour into Containers (3 minutes)
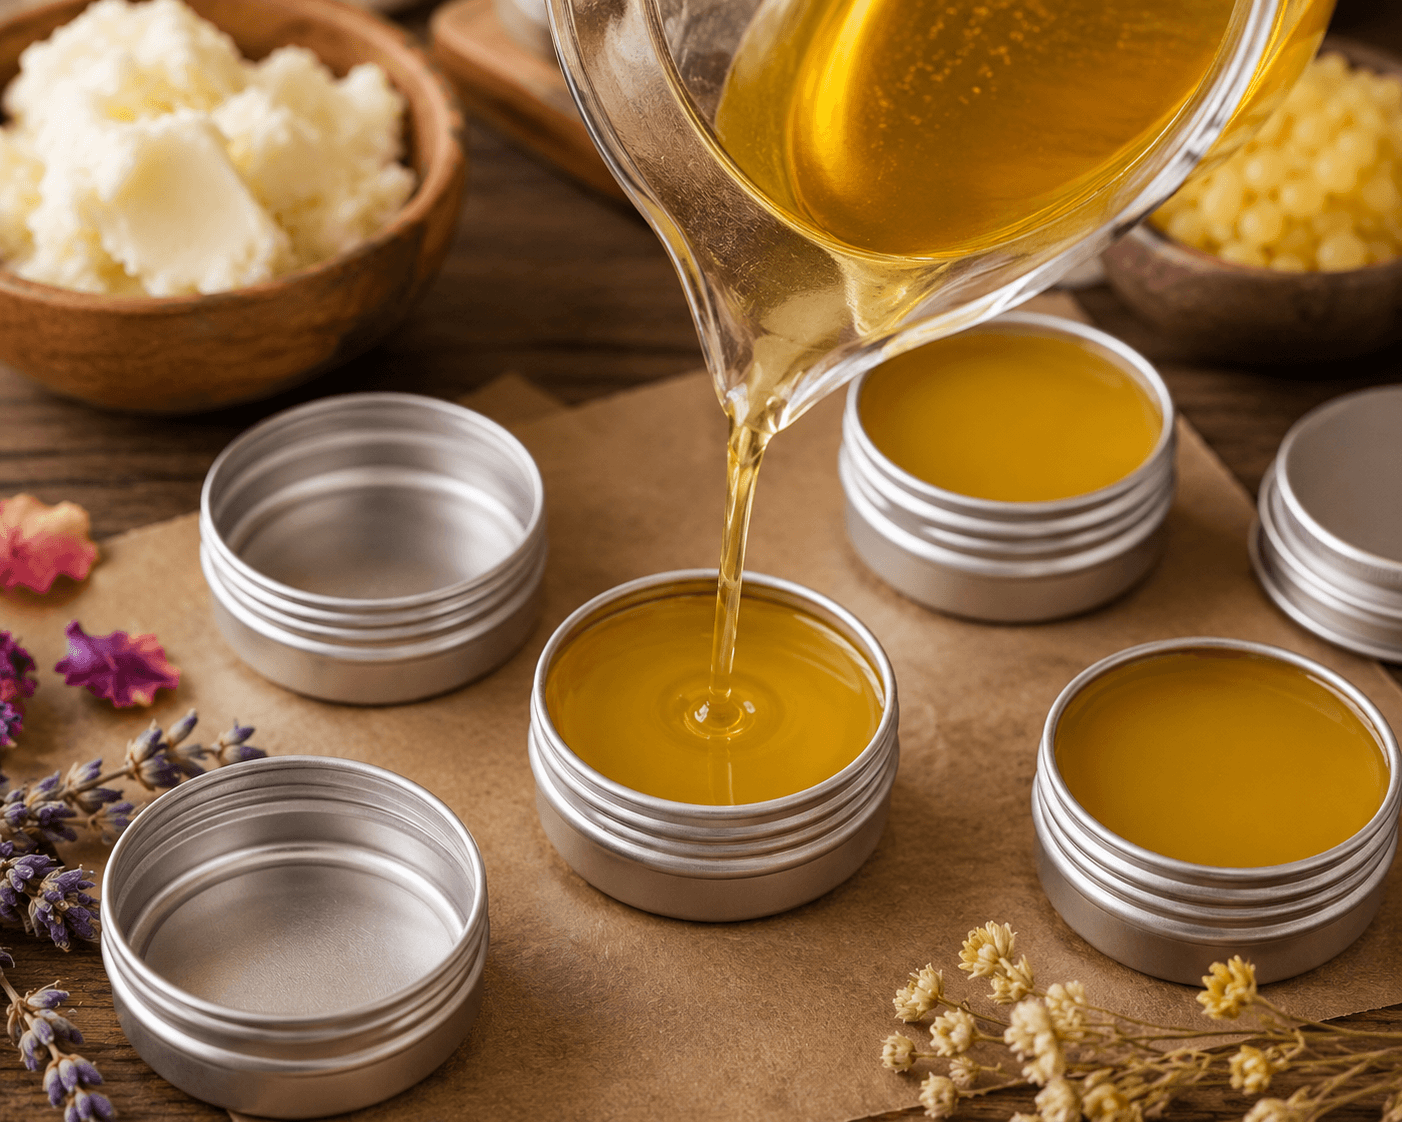
Work quickly because the mixture starts solidifying as it cools. Carefully pour or spoon the mixture into your lip balm tins or tubes.
Fill each container almost to the top, leaving just a tiny bit of space (about 1-2mm). The mixture will shrink slightly as it cools.
Pouring tips:
- Use a small funnel for tubes (or carefully spoon it in)
- For tins, pour slowly from the corner of your bowl
- If mixture starts thickening, gently reheat for 10 seconds
- Don’t worry about bubbles, they’ll disappear as it cools
Step 6: Let It Set (20-30 minutes)
Leave your lip balms undisturbed at room temperature. Don’t move them or put them in the fridge (this can cause cracking).
After 20-30 minutes, they’ll be completely solid and ready to use. However, they’ll continue to harden slightly over the next few hours, reaching their final texture.
What proper texture feels like: Firm but not rock-hard. Melts on contact with warm lips. Glides on smoothly without dragging.
Recipe Variation 1: Tinted Lip Balm (Adds Natural Color)
Want a hint of color? Add these to the basic recipe:
For Pink Tint:
- Add 1/4 teaspoon beetroot powder to the melted mixture
- Stir thoroughly to distribute color evenly
- Pour and set as normal
For Reddish Tint:
- Use 1/4 teaspoon hibiscus powder
- Creates a natural red-pink shade
- Adjusts to your natural lip color
Important: A little goes a long way! Start with less and add more if needed. Too much powder makes the balm grainy.
Recipe Variation 2: Medicated Lip Balm (For Very Dry, Cracked Lips)
This version has extra healing power for severely damaged lips:
Ingredients: (Same base recipe, but add:)
- 3 drops peppermint essential oil (cooling, healing)
- 1/4 teaspoon honey (antibacterial, speeds healing)
- 2 extra drops vitamin E
Method: Follow the basic recipe, but add honey when you add vitamin E. Stir very well honey and oil don’t mix easily, so keep stirring for a full minute.
What it does: The peppermint creates a cooling sensation that soothes pain. Meanwhile, honey helps heal cracks and prevents infection. Furthermore, the extra vitamin E accelerates skin repair.
Perfect for: Post-harmattan lip recovery, lips cracked from sun exposure, or anyone with chronically dry lips.
Recipe Variation 3: Chocolate Lip Balm (Smells Amazing!)
This one is especially popular for gifts and selling:
Ingredients: (Same base recipe, but substitute:)
- Use cocoa butter instead of regular butter (10g cocoa butter + 10g shea butter)
- Add 1/2 teaspoon natural cocoa powder
- Skip essential oils (cocoa provides scent)
Result: Natural chocolate scent and light brown color. Smells good enough to eat (but don’t!). Kids and teens especially love this version.
Troubleshooting: When Things Don’t Go as Planned
Problem: My lip balm is too soft/won’t harden
Why: Not enough beeswax, or you didn’t let it cool properly.
Fix: Next batch, increase beeswax by 2-3g. Alternatively, you can remelt your soft balm, add more beeswax, and repour.
Problem: My lip balm is too hard and doesn’t glide on
Why: Too much beeswax, or you used refined shea butter (which is naturally harder).
Fix: Remelt and add 5-10g more oil. This softens the texture without making it too oily.
Problem: My lip balm has grainy texture
Why: Mixture cooled too quickly or unevenly.
Fix: Remelt everything slowly, stir well, and let cool at room temperature (not in fridge). Pour at a slightly warmer temperature.
Problem: My lip balm separated in the container
Why: Ingredients weren’t fully melted together, or you added too much honey/liquid.
Fix: Remelt, ensure everything is completely liquid before mixing, stir more thoroughly, and reduce liquid add-ins.
Problem: It smells burnt
Why: Temperature was too high.
Fix: Lower your heat. You want gentle melting, not boiling. Use a thermometer if possible aim for 65-70°C maximum.
How to Package Your Lip Balm (Especially if Selling)
Packaging makes the difference between “homemade” and “professional.”
Container Options:
- Small tins (5g): Classic, reusable, looks artisanal – ₦30-50 each
- Twist-up tubes: Convenient, hygienic, portable – ₦40-80 each
- Slide tins: Unique, sturdy, premium feel – ₦60-100 each
Labeling Tips: Even if you’re not selling, labels make your lip balm look professional and help you remember what’s in each batch.
Include on label:
- Product name (“Natural Shea Lip Balm”)
- Key ingredients (Shea Butter, Coconut Oil, Beeswax, Vitamin E)
- Net weight (5g, 10g, etc.)
- Your name/brand
- Manufacturing date
- “Keep away from direct heat”
Design tips:
- Use Canva for free label designs
- Keep it simple clean and readable beats fancy
- Match your label colors to your balm type (pink for tinted, brown for chocolate)
- Print on sticker paper or regular paper with clear tape
Gifting ideas:
- Package 3-4 different flavors in a small gift box
- Add a handwritten “ingredients” card
- Tie with ribbon or twine for rustic look
- Perfect for birthdays, Christmas, bridesmaid gifts
Pricing Guide (If You’re Selling)
Many people start lip balm businesses because the math is beautiful:
Cost Breakdown per 5g Tin:
- Shea butter: ₦12
- Oils: ₦8
- Beeswax: ₦15
- Vitamin E & extras: ₦5
- Container & label: ₦40 Total Cost: ₦80 per lip balm
Recommended Retail Prices:
- Direct to friends/family: ₦300-400
- Market/event sales: ₦400-500
- Online sales: ₦500-600 (includes shipping consideration)
- Bulk/wholesale (5+): ₦250-300 each
Profit per balm: ₦220-520 depending on sales channel
Scale example: Sell 50 lip balms per month at ₦400 each = ₦20,000 revenue, ₦16,000 profit for a few hours of work!
Storage and Shelf Life
How to store:
- Keep in cool, dry place away from direct sunlight
- Don’t leave in your car (melts in heat!)
- Screw lids on tightly after each use
- Keep away from water (prevents contamination)
Shelf life:
- Without vitamin E: 3-6 months
- With vitamin E: 6-12 months
- Signs it’s expired: Rancid smell, changed color, separated texture
Pro tip: Make small batches more frequently rather than large batches that might expire. Fresh is always better!
Why Shea Butter Makes the Best Lip Balm
Let me tell you why shea butter is the star ingredient here.
Unlike petroleum jelly that just coats your lips, shea butter actually penetrates and heals. It contains:
Vitamins A & E: Repair damaged skin cells and prevent further damage Fatty acids: Lock in moisture for hours, not just minutes Natural anti-inflammatory compounds: Reduce pain and swelling in cracked lips Cinnamic acid: Provides mild natural sun protection (about SPF 6)
Moreover, shea butter is native to West Africa. Consequently, it’s perfectly suited for our climate, our skin type, and our weather conditions. It’s literally been protecting African skin for thousands of years.
When you use quality, unrefined shea butter, you’re getting all these benefits. Refined shea butter (the white, odorless kind) has lost most of these healing properties during processing.
Your Lip Balm Journey Starts This Weekend
Making your first batch of lip balm is exciting. In just 15 minutes, you’ll have created something that works better than what you’ve been buying in stores.
Start with the basic recipe. Get comfortable with the process. Then, experiment with variations, try different scents, add natural color, create themed collections.
This weekend’s action steps:
- Gather your ingredients (everything you need is available)
- Set aside 30 minutes (15 for making, 15 for cleanup)
- Make your first batch of 10 lip balms
- Test one immediately
- Give some away and watch people’s reactions
The best part? Once you master this simple recipe, you’ll have the confidence to try other DIY beauty projects. Many successful beauty entrepreneurs started exactly where you are now, making their first batch of lip balm in their kitchen.
Ready to start? Get your quality ingredients:
- Natural Shea Butter (Ivory Color) – Premium, unrefined, perfect for lip balm
- Sweet Almond Oil – Light, non-greasy, absorbs beautifully
- Vegetable Glycerine – If you want to add extra moisture
Questions about making lip balm? Drop them in the comments below! I read and respond to every single one. Let’s make your first batch together!