
How to Make Sugar Wax at Home (Nigerian Recipe That Works)
Salon waxing in Nigeria is expensive. Depending on where you go in Lagos, Abuja, or Port Harcourt, a single waxing session costs anywhere between ₦3,000 and ₦8,000. Moreover, you have to book appointments, travel there, and trust a stranger with some of your most sensitive areas.
But what if you could get the same smooth, hair-free results at home for less than ₦200? Furthermore, what if the recipe used only three ingredients you probably already have in your kitchen right now?
That’s exactly what sugar waxing offers. As Nigeria’s leading cosmetic raw materials supplier at Sophix Natural, we’ve helped thousands of beauty entrepreneurs add sugar wax to their product lines successfully. Additionally, we’ve seen countless Nigerian women transform their personal grooming routines with this simple, affordable technique.
Today, I’m sharing the complete guide to making sugar wax at home. Specifically, I’ll cover two proven recipes, exactly how to apply it correctly, and how to avoid the painful mistakes most beginners make.
Whether you’re making it for personal use or starting a sugar wax business, this guide has everything you need. Let’s get into it.
What Exactly is Sugar Waxing?
Before jumping into the recipe, let’s understand what sugar waxing actually is and why it’s different from regular wax.
Sugar wax is a hair removal paste made from three simple ingredients: sugar, water, and lemon juice. Consequently, it’s completely natural with no synthetic chemicals, artificial fragrances, or harsh additives. Moreover, it’s been used across the Middle East and Africa for centuries under the name “halawa” or “sugaring.”
Here’s why sugar waxing is different from regular salon wax:
Regular wax is applied hot and adheres to both hair AND skin. Therefore, when you pull it off, it removes a layer of skin along with the hair. This is why regular waxing causes redness, irritation, and sometimes even bleeding.
Sugar wax, on the other hand, only adheres to hair and dead skin cells. As a result, it doesn’t stick to live skin. Consequently, it’s significantly less painful, causes much less irritation, and is gentler on sensitive skin.
Additionally, sugar wax is water-soluble. Therefore, any residue rinses off easily with warm water rather than requiring special oil-based removers. Furthermore, it can be reused during a single session, making it more economical than strip wax.
Why Sugar Waxing Works Particularly Well for African Skin
Nigerian and African skin has specific characteristics that make sugar waxing especially beneficial.
Melanin-rich skin is more prone to post-inflammatory hyperpigmentation, meaning any irritation or trauma to the skin can leave dark marks. Consequently, the gentler nature of sugar waxing compared to regular wax is particularly important for our skin tone.
According to research published on PubMed, traumatic hair removal methods that damage the skin barrier significantly increase the risk of post-inflammatory hyperpigmentation in darker skin tones. Therefore, choosing a gentler method like sugar waxing actively helps prevent the dark marks that often follow regular waxing.
Additionally, sugar wax can be applied at body temperature or slightly warm, unlike regular wax that must be applied very hot. Consequently, the risk of burns on sensitive African skin is dramatically reduced.
Furthermore, the natural lemon juice in sugar wax has mild brightening properties. As a result, consistent sugar waxing may actually help gradually brighten the skin in treated areas over time.
What You’ll Need Before Starting (Sugar Wax Home Essentials)
Ingredients for Sugar Wax (Only 3!):
Basic Recipe (Soft Paste – Beginner Friendly):
- White granulated sugar – 2 cups (400g)
- Fresh lemon juice – 1/4 cup (about 2 large lemons)
- Water – 1/4 cup
Hard Recipe (Advanced – Better Results):
- White granulated sugar – 2 cups (400g)
- Fresh lemon juice – 3 tablespoons
- Water – 2 tablespoons
Total Cost: Approximately ₦150-₦200 for enough wax for multiple sessions
Equipment You’ll Need:
- Heavy-bottomed pot or saucepan
- Candy thermometer (optional but helpful)
- Wooden spoon or silicone spatula
- Glass jar for storage
- Cotton or linen fabric strips (cut old bedsheets or buy cheap cotton fabric)
- Talcum powder or cornstarch
- Warm water for cleanup
Preparation Tips:
Grow your hair to the right length first. Hair should be at least 6mm long (about the length of a grain of rice) for sugar wax to grip effectively. Consequently, if your hair is too short, the wax won’t catch it properly.
Exfoliate 24 hours before waxing. This removes dead skin cells and helps the wax grip hair more effectively. Furthermore, it reduces the risk of ingrown hairs afterward.
Clean and dry the area completely. Any moisture on skin prevents the wax from adhering properly. Therefore, ensure skin is completely dry before application.
Recipe 1: Soft Sugar Wax (Perfect for Beginners)
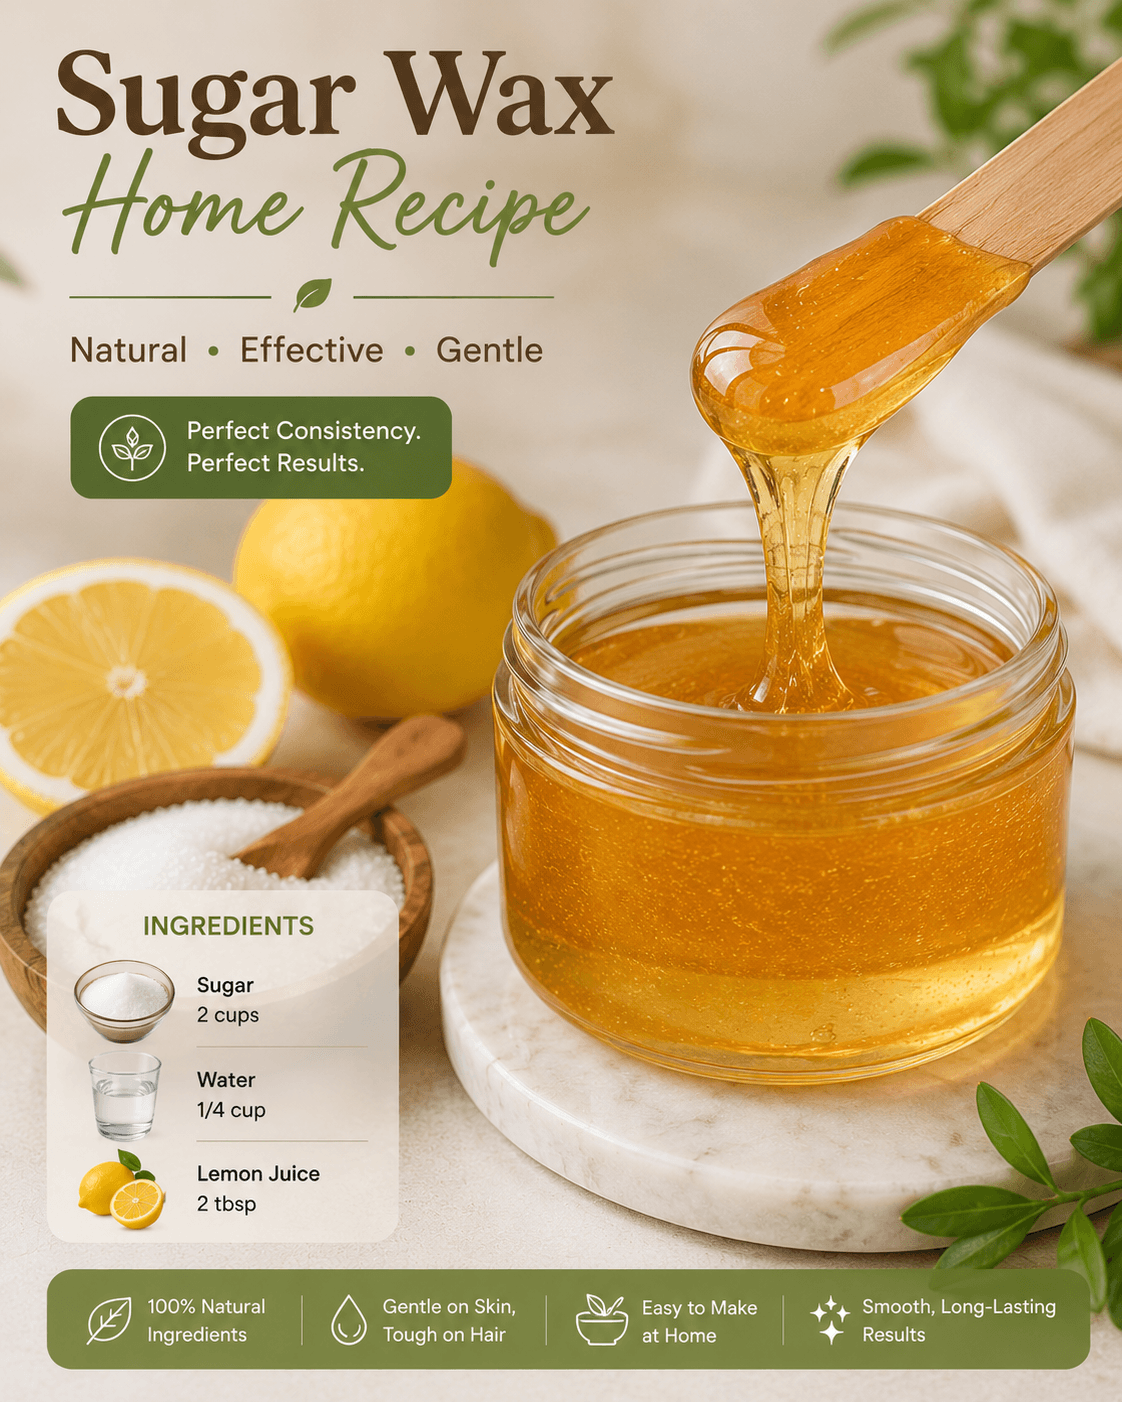
This is the recipe I recommend for complete beginners. It’s more forgiving, easier to control, and works well for most body areas.
Step 1: Combine Ingredients (2 minutes)
Add 2 cups of sugar, 1/4 cup of lemon juice, and 1/4 cup of water to your heavy-bottomed pot. Stir gently to combine before turning on the heat.
Why lemon juice? The citric acid in lemon juice prevents the sugar from crystallizing during cooking. Additionally, it gives the wax its characteristic slight tartness and contributes mild brightening properties.
Step 2: Cook on Medium Heat (10-15 minutes)
Turn heat to medium and stir constantly as the mixture heats up. Specifically, keep stirring to prevent the sugar from burning on the bottom of the pot.
What you’ll see as it cooks:
First 3-5 minutes: Mixture bubbles vigorously and looks watery. Keep stirring consistently.
5-8 minutes: Bubbles become smaller and mixture starts thickening. The color begins turning from clear to light golden yellow.
8-12 minutes: Mixture turns amber or honey-colored. Furthermore, bubbles become slow and thick. This is when you need to watch carefully.
12-15 minutes: Mixture reaches the correct consistency for soft wax. It should be a deep amber color, similar to honey.
Step 3: Test the Consistency
Drop a small amount (half a teaspoon) into a glass of cold water. Then, try to pick it up with your fingers.
Soft wax consistency: The dropped wax forms a soft, pliable ball that you can easily mold between your fingers. Moreover, it shouldn’t be sticky or dissolve completely.
If it dissolves: Cook for 2-3 more minutes and test again.
If it’s rock hard: You’ve overcooked it. Unfortunately, you’ll need to start over. However, add a tablespoon of water to the pot and reheat gently to salvage if possible.
Step 4: Cool Before Use
Pour the wax into a glass jar immediately. Let it cool for 15-20 minutes before using. Specifically, the wax should be warm to touch but not hot. Test on your inner wrist first.
Important: Never apply hot wax to your skin. Consequently, always test temperature on your wrist before applying anywhere else.
Step 5: Store Properly
Leftover wax keeps at room temperature for up to 6 months in a sealed glass jar. If it hardens, simply warm it gently in a pot of warm water or microwave for 10-15 seconds. Then, stir and test temperature before use.
Recipe 2: Hard Sugar Wax (Better Results, More Advanced)
This recipe produces a firmer wax that doesn’t require fabric strips. Instead, you apply it with your hands and flick it off directly. Consequently, it’s messier to learn but produces cleaner results once mastered.
The Difference in Method:
Soft wax: Applied with a spatula, removed with fabric strips (like traditional waxing).
Hard wax: Applied with your hands (or a spatula), rolled and flicked off without strips.
Cooking Instructions:
Follow the same cooking process as Recipe 1 but with the adjusted quantities (3 tablespoons lemon juice, 2 tablespoons water instead of 1/4 cup each).
The key difference: Cook for 2-3 minutes longer than soft wax. Specifically, you want a deeper amber color and a firmer consistency when tested in cold water.
Consistency test: Drop into cold water. The hard wax should form a firm ball that clicks against the glass. Moreover, it should be moldable when warm but firm when cool.
How to Apply Hard Wax:
Step 1: Let the wax cool until it’s warm but very pliable (like warm putty).
Step 2: Scoop a small amount and roll it in your hands until it forms a ball.
Step 3: Press and spread it onto your skin in the direction of hair growth. Apply it thickly enough to get a firm grip.
Step 4: Let it sit for 30-60 seconds until slightly cooled and firm.
Step 5: Flick up one edge with your finger to create a tab. Then, hold skin taut with one hand and quickly flick the wax off against the direction of hair growth in one swift motion.
How to Apply Sugar Wax Correctly (Step-by-Step)
Whether you’re using soft or hard wax, proper application technique determines whether you get smooth results or painful bruising.
Preparation (Do This Every Time):
Step 1: Exfoliate the area 24 hours before waxing if possible.
Step 2: Clean the area thoroughly with mild soap and warm water on the day of waxing.
Step 3: Dry completely. Additionally, dust with talcum powder or cornstarch to absorb any remaining moisture. This step dramatically improves wax adhesion.
Step 4: Warm your sugar wax to the right temperature. Specifically, test on your inner wrist. It should feel warm like a hot water bottle, not burning hot.
Application (For Soft Wax with Strips):
Step 1: Using a spatula or popsicle stick, apply a thin layer of wax in the direction of hair growth. Keep the layer thin and even.
Step 2: Immediately press a fabric strip firmly onto the wax. Rub it 3-4 times in the direction of hair growth to ensure good adhesion.
Step 3: Hold the skin taut with one hand. This step is crucial because loose skin makes waxing significantly more painful.
Step 4: Quickly pull the strip off in the OPPOSITE direction of hair growth, keeping it parallel to the skin (don’t pull upward). The faster you pull, the less it hurts.
Step 5: Immediately press your hand firmly onto the waxed area. Specifically, the pressure from your warm hand dramatically reduces the stinging sensation.
Step 6: Repeat on the next section. You can reuse fabric strips 2-3 times before they lose adhesion.
Body Area Specific Tips:
Legs:
Work in small sections from ankle upward. Additionally, keep the skin taut by flexing your muscles. Legs are the easiest area for beginners to start with.
Underarms:
Raise your arm and hold it against your head to stretch the skin. Consequently, the taut skin makes waxing significantly less painful. Apply in small sections because underarm hair grows in multiple directions.
Upper Lip:
Apply a very thin layer because the skin here is extremely sensitive. Moreover, hold the upper lip taut by pressing it against your teeth from inside. Pull quickly and immediately press firmly afterward.
Bikini Line:
This is the most sensitive area. Therefore, start with legs and underarms first until you’re confident with your technique. Always keep skin very taut and work in tiny sections.
Aftercare: What to Do After Sugar Waxing
Proper aftercare is just as important as the waxing itself. Specifically, it prevents the ingrown hairs, dark marks, and irritation that many beginners experience.
Immediately After Waxing:
Apply a cold compress or ice wrapped in cloth to reduce redness and inflammation. Furthermore, avoid hot showers, saunas, or exercise for at least 4 hours after waxing. Heat opens pores and increases irritation risk.
24-48 Hours After Waxing:
Apply a light, soothing oil like Sweet Almond Oil to the waxed area. The vitamin E and fatty acids in sweet almond oil soothe irritation and prevent ingrown hairs. Additionally, avoid tight clothing that rubs against freshly waxed skin.
3-5 Days After Waxing:
Begin gentle exfoliation to prevent ingrown hairs. Specifically, use a soft cloth or gentle scrub 3 times weekly. This keeps follicles clear as hair begins to regrow. Furthermore, applying Coconut Oil to the waxed area helps keep skin moisturized and reduces the risk of ingrown hairs.
Ongoing Skin Care:
Apply Vegetable Glycerine mixed with water to waxed areas daily. The deep hydration prevents the dryness and irritation that leads to ingrown hairs and dark marks. Moreover, consistent moisturization keeps skin smooth and healthy between waxing sessions.
Troubleshooting: Common Sugar Wax Problems
Problem: Wax is too sticky and won’t come off cleanly
Why: Wax was undercooked or applied too thickly.
Fix: Cook for 3-5 more minutes next batch. Additionally, apply thinner layers and use talcum powder on skin before application.
Problem: Wax snaps instead of pulling hair
Why: Wax was overcooked and too hard, or applied too cold.
Fix: Warm the wax slightly and add a teaspoon of water to soften. Furthermore, apply at a warmer temperature next time.
Problem: Hair breaks instead of being pulled from root
Why: Hair was too short, or you pulled at the wrong angle.
Fix: Wait until hair is at least 6mm long. Additionally, always pull parallel to skin rather than upward.
Problem: Extreme pain and bruising
Why: Skin wasn’t held taut enough, or you pulled too slowly.
Fix: Always hold skin very taut before pulling. Moreover, the faster you pull the strip, the less painful it is. Slow pulling causes more bruising and pain.
Problem: Wax crystallized during cooking
Why: Insufficient lemon juice or stirring, or heat was too high.
Fix: Ensure you stir constantly and maintain medium heat. Additionally, increase lemon juice by 1 tablespoon next batch.
Problem: Dark marks after waxing
Why: Skin was irritated or traumatized during removal.
Fix: Apply Natural Shea Butter immediately after waxing to soothe skin. Furthermore, ensure wax temperature is correct and always keep skin taut during removal.
Sugar Wax as a Business Opportunity
Many Nigerian women have turned sugar waxing into a profitable beauty business. Here’s why it makes excellent business sense.
The numbers:
- Cost to make 500g of sugar wax: approximately ₦200
- Retail price for 500g jar: ₦2,000-₦3,000
- Service price per session: ₦2,500-₦5,000
What makes it a great business:
First, the ingredients are extremely affordable and widely available. Second, the product has a long shelf life (6 months) reducing waste significantly. Third, it’s a consumable product that customers need repeatedly. Furthermore, the natural, chemical-free positioning commands premium prices in the current Nigerian beauty market.
Starting your sugar wax business:
- Make your first batch to test and perfect your recipe
- Package professionally in glass jars with clear labels
- Offer both the product and waxing services
- Market on Instagram, WhatsApp, and TikTok with before/after content
- Position as “natural” and “chemical-free” for premium pricing
Frequently Asked Questions About Sugar Waxing at Home
How long do results last?
Results typically last 3-6 weeks depending on your hair growth rate. Furthermore, with consistent waxing over time, hair grows back finer and sparser, meaning sessions become easier.
Does it work on all body hair?
Sugar wax works on most body hair including legs, underarms, arms, upper lip, chin, and bikini line. However, it’s not recommended for eyebrows (too imprecise) or very coarse beard hair.
Can I wax during my period?
You can, but skin is significantly more sensitive during menstruation. Consequently, consider scheduling your session for a different time if you’re pain-sensitive.
How do I prevent ingrown hairs?
Regular exfoliation (3 times weekly) and consistent moisturization are the most effective prevention methods. Additionally, avoid tight clothing immediately after waxing.
Can I make sugar wax without lemon juice?
You can substitute with apple cider vinegar in equal quantities. However, fresh lemon juice produces the best results and is more readily available in Nigeria.
Your Action Plan: Try Sugar Waxing This Weekend
You now have everything you need to make and use sugar wax at home successfully.
First, gather your three ingredients (sugar, lemons, water). Everything is available at any Nigerian market for under ₦500.
Second, start with the soft wax recipe because it’s more forgiving for beginners.
Third, practice the technique on your legs first before attempting more sensitive areas.
Fourth, follow the aftercare routine carefully to prevent ingrown hairs and dark marks.
Finally, take before and after photos because the results will impress you!
Ready to start? Get your quality aftercare ingredients:
- Sweet Almond Oil – Soothes and nourishes skin immediately after waxing
- Coconut Oil – Prevents ingrown hairs between waxing sessions
- Vegetable Glycerine – Keeps waxed skin deeply hydrated and smooth
- Natural Shea Butter – Soothes irritation and prevents dark marks after waxing
Have you tried sugar waxing at home before? How did it go? Share your experience in the comments below. Your tips and tricks could help someone else in our community of 5,000+ Nigerian beauty enthusiasts get smooth, hair-free skin at home!